
Classic Homemade Bread — Simple, Soft, and Delicious
Why you’ll love this recipe
-
Soft, tender crumb with a light crust.
-
Uses simple pantry ingredients.
-
Two loaves from one batch — great for sandwiches, soup, or meal prep.
-
Beginner friendly — step-by-step with helpful troubleshooting.
Yield & Times
-
Yield: 2 medium loaves (about 10–12 slices per loaf)
-
Prep time: 20 minutes active (plus short rests)
-
First rise (bulk fermentation): ~60–90 minutes (until doubled — depends on room temperature)
-
Final proof: ~20–30 minutes
-
Bake time: 25–30 minutes at 200°C (392°F)
-
Total time: ~2–3 hours (including rises)
Ingredients (as provided)
-
Dry yeast: 10 g (1 packet)
-
Warm water: 200 ml (for dissolving yeast)
-
Flour: 120 g (1 cup) + 720 g (6 cups) → Total flour = 840 g
-
Salt: 10 g (1 teaspoon)
-
Warm water (add): 400 ml → Total water = 600 ml
-
Egg yolk: 1 (for brushing)
-
Milk: 1 tablespoon (mix with egg yolk for wash)
Baker’s notes (percentages):
-
Hydration ≈ 71% (600 g water ÷ 840 g flour) — this yields a soft, slightly tacky dough.
-
Yeast ≈ 1.19% of flour (10 g ÷ 840 g).
-
Salt ≈ 1.19% of flour (10 g ÷ 840 g).
Equipment
-
Large mixing bowl
-
Measuring cups/spoons or scale (recommended)
-
Wooden spoon or dough scraper
-
Baking tray (or 2 loaf tins if preferred)
-
Oven
-
Pastry brush
Step-by-Step Instructions
1. Proof the yeast (15 minutes)
-
In a medium bowl, pour 200 ml warm water (warm to the touch, about 38–43°C / 100–110°F).
-
Sprinkle 10 g dry yeast into the water and stir until dissolved.
-
Add 120 g flour and mix into a smooth batter. Cover and let rest 15 minutes.
-
This pre-mix (a short autolyse-like step) wakes the yeast and makes the dough easier to handle.
-
2. Build the dough
-
After 15 minutes, add 400 ml warm water to the yeast mix and stir until combined.
-
Gradually add the remaining 720 g flour and 10 g salt. Mix until the dough comes together into a shaggy mass.
3. Knead to a soft, slightly tacky dough (3–8 minutes)
-
Turn dough onto a lightly floured surface and knead 3–4 minutes by hand (or 4–6 minutes with a stand mixer on low). Goal: a soft, slightly non-sticky dough.
-
If dough is very sticky, dust lightly with flour a tablespoon at a time — avoid adding too much.
-
Alternative: use stretch-and-fold every 10–15 minutes for 2–3 sets (great for higher hydration).
-
4. Bulk fermentation (first rise)
-
Shape into a ball, place in a lightly oiled bowl, cover with cling film or a damp towel. Let the dough rise until doubled in size — typically 60–90 minutes at room temperature (warmer room → faster rise).
-
Check by gently pressing a finger into the dough — if the indentation springs back slowly, it’s ready.
-
5. Divide, shape, and bench rest
-
Gently deflate the dough to remove large gas pockets. Divide into two equal pieces.
-
Roll each piece into a ball and rest for 10 minutes, covered (bench rest) to relax the gluten.
6. Shape the loaves
-
Lightly flour your work surface. Flatten each piece with your fingers, then roll the edges inward toward the center and tuck to create a smooth top. For sandwich loaves, shape into logs and place seam-side down on a baking tray or into loaf tins.
7. Final proof
-
Arrange shaped dough on a baking tray, cover, and leave to proof about 20 minutes (or until puffy). You want visibly risen but not over-proofed dough.
8. Egg wash & bake
-
Preheat oven to 200°C (392°F).
-
Mix 1 egg yolk + 1 tablespoon milk, brush gently over the tops.
-
Bake at 200°C for 25–30 minutes until golden brown and the loaves sound hollow when tapped on the bottom (or until internal temp ~95°C / 203°F).
-
Remove from oven and cool on a rack for at least 10 minutes before slicing.
Serving Suggestions
-
Serve warm with butter, jam, or olive oil.
-
Use as sandwich bread or for grilled cheese.
-
Excellent with soups, stews, and salads.
Variations
-
Herbed loaf: add 1–2 tbsp chopped fresh rosemary, thyme, or mixed dried herbs.
-
Seeded top: brush with egg wash and sprinkle sesame, poppy, or sunflower seeds before baking.
-
Whole wheat swap: replace up to 25% of flour with whole wheat (expect denser crumb; add a touch more water).
-
Egg-wash alternative: brush with milk or milk + a tablespoon of honey for a softer shine.
Troubleshooting & Tips
-
Dough too sticky: add flour 1 tbsp at a time during kneading, but don’t overdo it — dough should remain slightly tacky.
-
Dense loaf: under-proofing or too much flour; ensure bulk rise until doubled.
-
Too quick rise/overproofed: cooler fermentation or reduce yeast slightly.
-
Crust too dark: place foil loosely over loaves for the last 5–10 minutes.
-
Chewy crumb: allow full rest and avoid over-kneading.
Storage
-
Room temp: Keep in a bread bag or wrapped in a tea towel for up to 3 days.
-
Freezer: Slice and freeze in resealable bags for up to 3 months. Rewarm slices in toaster or oven.
Nutrition (approx. per serving)
(User-provided; approximate)
-
Calories: 150 | Total Fat: 1.5 g | Saturated Fat: 0.5 g | Cholesterol: 20 mg
-
Sodium: 300 mg | Total Carbs: 30 g | Dietary Fiber: 1 g | Sugars: 1 g | Protein: 4 g
FAQ
Q: Can I use instant yeast instead of active dry?
A: Yes — if using instant yeast, sprinkle it into the flour (skip proofing in water). Use about 70–80% of the active dry amount (so ~7–8 g).
Q: Can I make one large loaf instead of two?
A: Yes — shape into one larger loaf, but adjust bake time (may need 5–10 minutes longer).
Q: Why do you add flour early then more later?
A: The initial small flour addition with the yeast-and-water helps wake the yeast and creates a looser start for a high-hydration dough — it improves handling and texture.
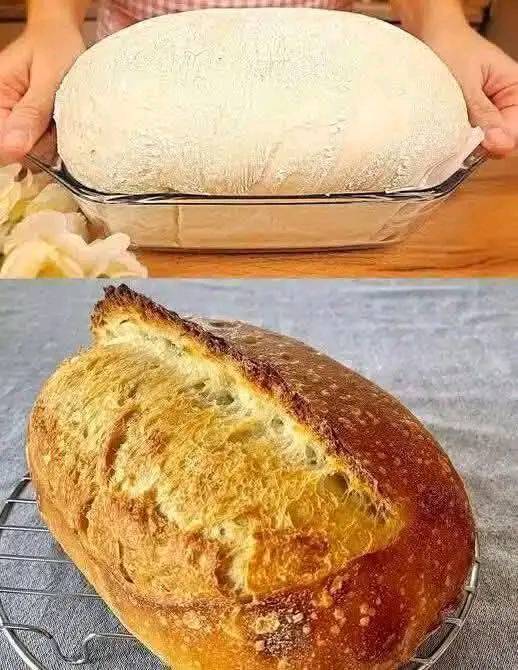
Final Notes
This classic recipe yields soft, open-crumb loaves with a golden crust — a great everyday bread. Because the dough hydration is relatively high (~71%), expect a slightly tacky dough that produces a tender crumb. With practice you’ll learn the feel of perfectly proofed dough — once you do, this simple loaf is endlessly versatile.